Security cameras help keep homes and businesses safe. Zmodo makes popular security cameras. Many people want to connect these cameras to a DVR. A DVR records video so you can watch it later. This guide will help you hook your Zmodo security cameras to a DVR easily.
What You Need Before Starting
Before you start, gather these items:
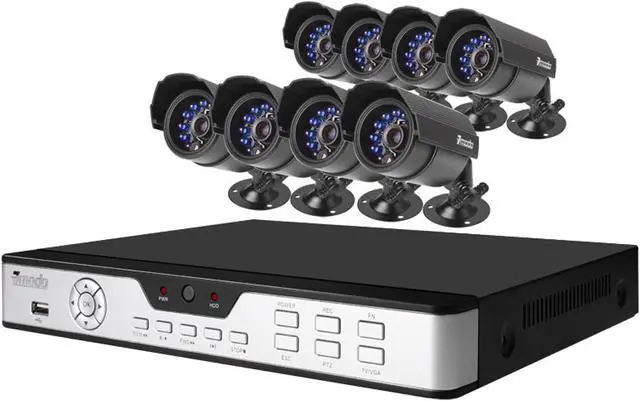
- Zmodo security cameras
- A DVR that supports cameras
- Power adapters for cameras
- Coaxial cables or Ethernet cables (depending on camera type)
- Connectors (BNC connectors for coax cables)
- A monitor or TV to see the DVR output
- Tools: screwdriver, cable tester (optional)
Make sure your DVR supports the camera type. Some cameras use analog signals, others use digital. Zmodo cameras can be analog or IP cameras.
Types of Zmodo Cameras
Before connecting, know your camera type:
- Analog cameras: Use coaxial cables. Connect to DVR’s BNC ports.
- IP cameras: Use Ethernet cables. Connect to network or NVR.
This guide focuses on analog cameras connecting to a DVR. IP cameras work differently.
Step 1: Plan Camera Placement
Decide where to place each camera. Good spots cover entrances, driveways, or important rooms. Avoid places with too much light or bad weather exposure.
Measure cable length needed from camera to DVR. Add extra length for easier installation.
Step 2: Run Cables from Cameras to DVR
For analog cameras, use coaxial cables with BNC connectors. Run cables neatly along walls or ceilings. Avoid sharp bends to protect cables.
If inside your home, use cable clips to hold cables. Outside, use waterproof covers to protect cables.
Step 3: Connect Cameras to Power
Most Zmodo cameras need power adapters. Plug each camera’s power adapter into a wall outlet. Connect power cable to the camera.
Some cameras use power over coax (PoC). Check if your camera and DVR support PoC. It sends power and video over one cable.
Step 4: Connect Cameras to DVR
At the DVR, find the BNC input ports. Each port is for one camera. Connect the coax cable from each camera to a BNC port.
Make sure connections are tight. Loose cables cause bad video quality.
Step 5: Connect DVR to Monitor or TV
Use HDMI or VGA cable to connect your DVR to a screen. This lets you see live video and recordings.
Turn on the monitor and DVR. Check if the cameras show video.
Step 6: Configure the DVR Settings
Use the DVR’s remote or mouse to open settings. Set camera names and adjust video quality.
You can set motion detection to save storage space. The DVR records only when it sees movement.
Set recording schedules if needed. For example, record only at night.
Credit: www.newegg.com
