IP cameras are important for home and business security. They help you watch over your property. Installing an IP camera can seem hard. But, it is easy if you follow the steps. Let’s learn how to do it.
What is an IP Camera?
An IP camera is a digital camera. It sends video through the internet. Unlike old cameras, IP cameras do not need a recording device. You can watch the video on your phone or computer.
Why Install an IP Camera?
IP cameras provide safety. They help watch your home when you are not there. They also help businesses keep track of activities. With an IP camera, you can see what is happening in real-time.
Things You Need
Before you start, gather these items:
- IP Camera
- Power Adapter
- Ethernet Cable
- Router
- Computer or Smartphone
- Mounting Tools (Screws, Drill)
Step 1: Choose the Right Place
Location is key for your camera. Choose a place with a good view. Make sure it covers all important areas. Common places include entrances, hallways, and backyards.
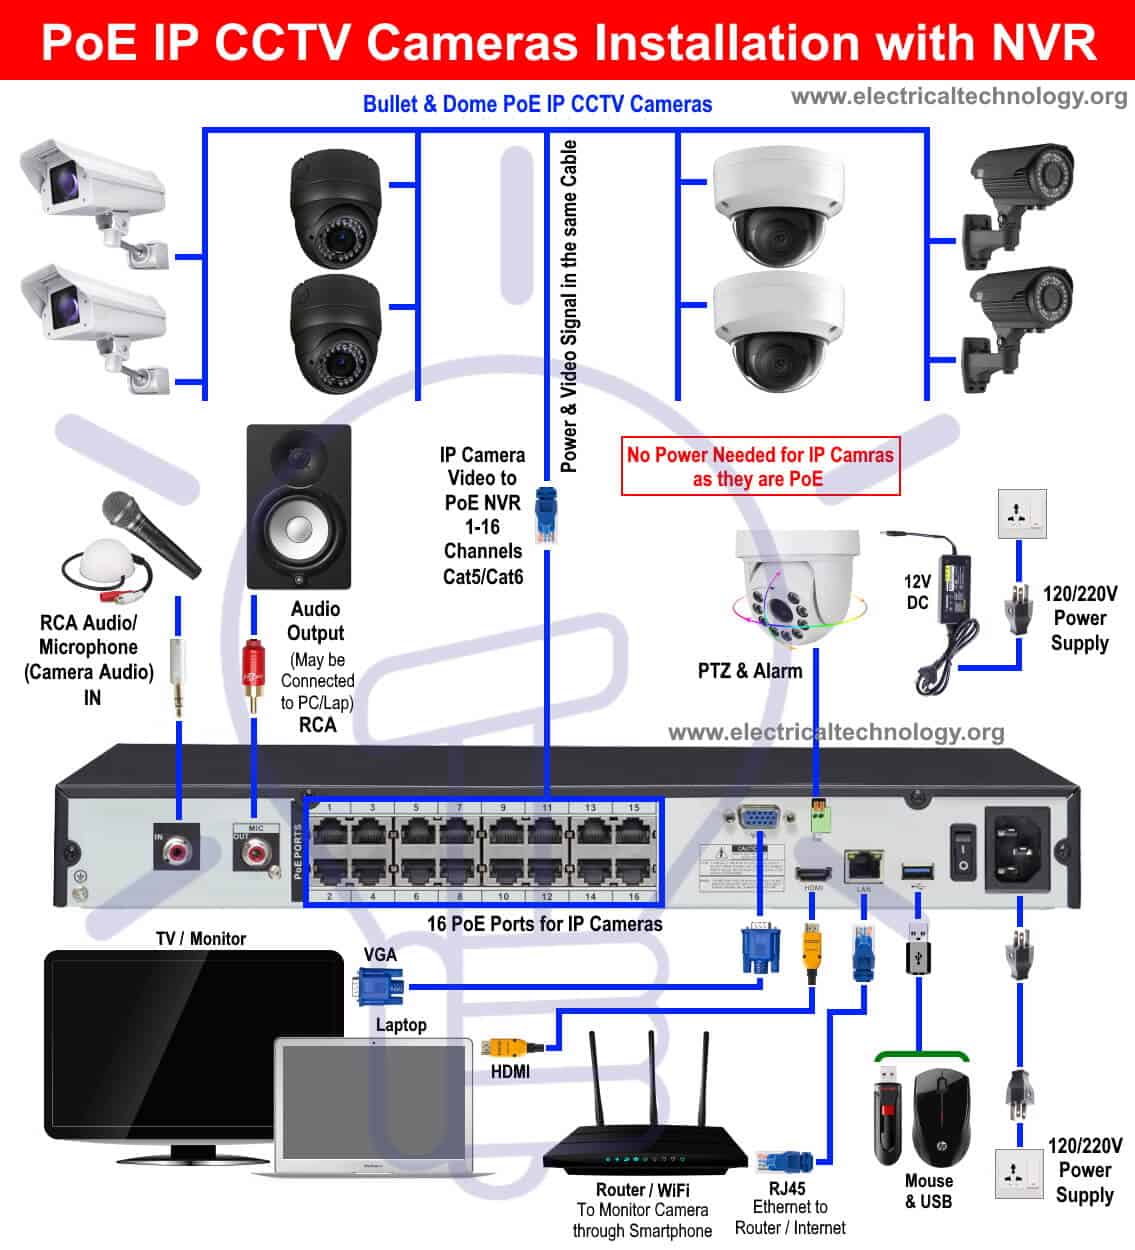
Step 2: Connect the Camera
First, power the camera. Plug the power adapter into the camera. Then, connect it to a power outlet.
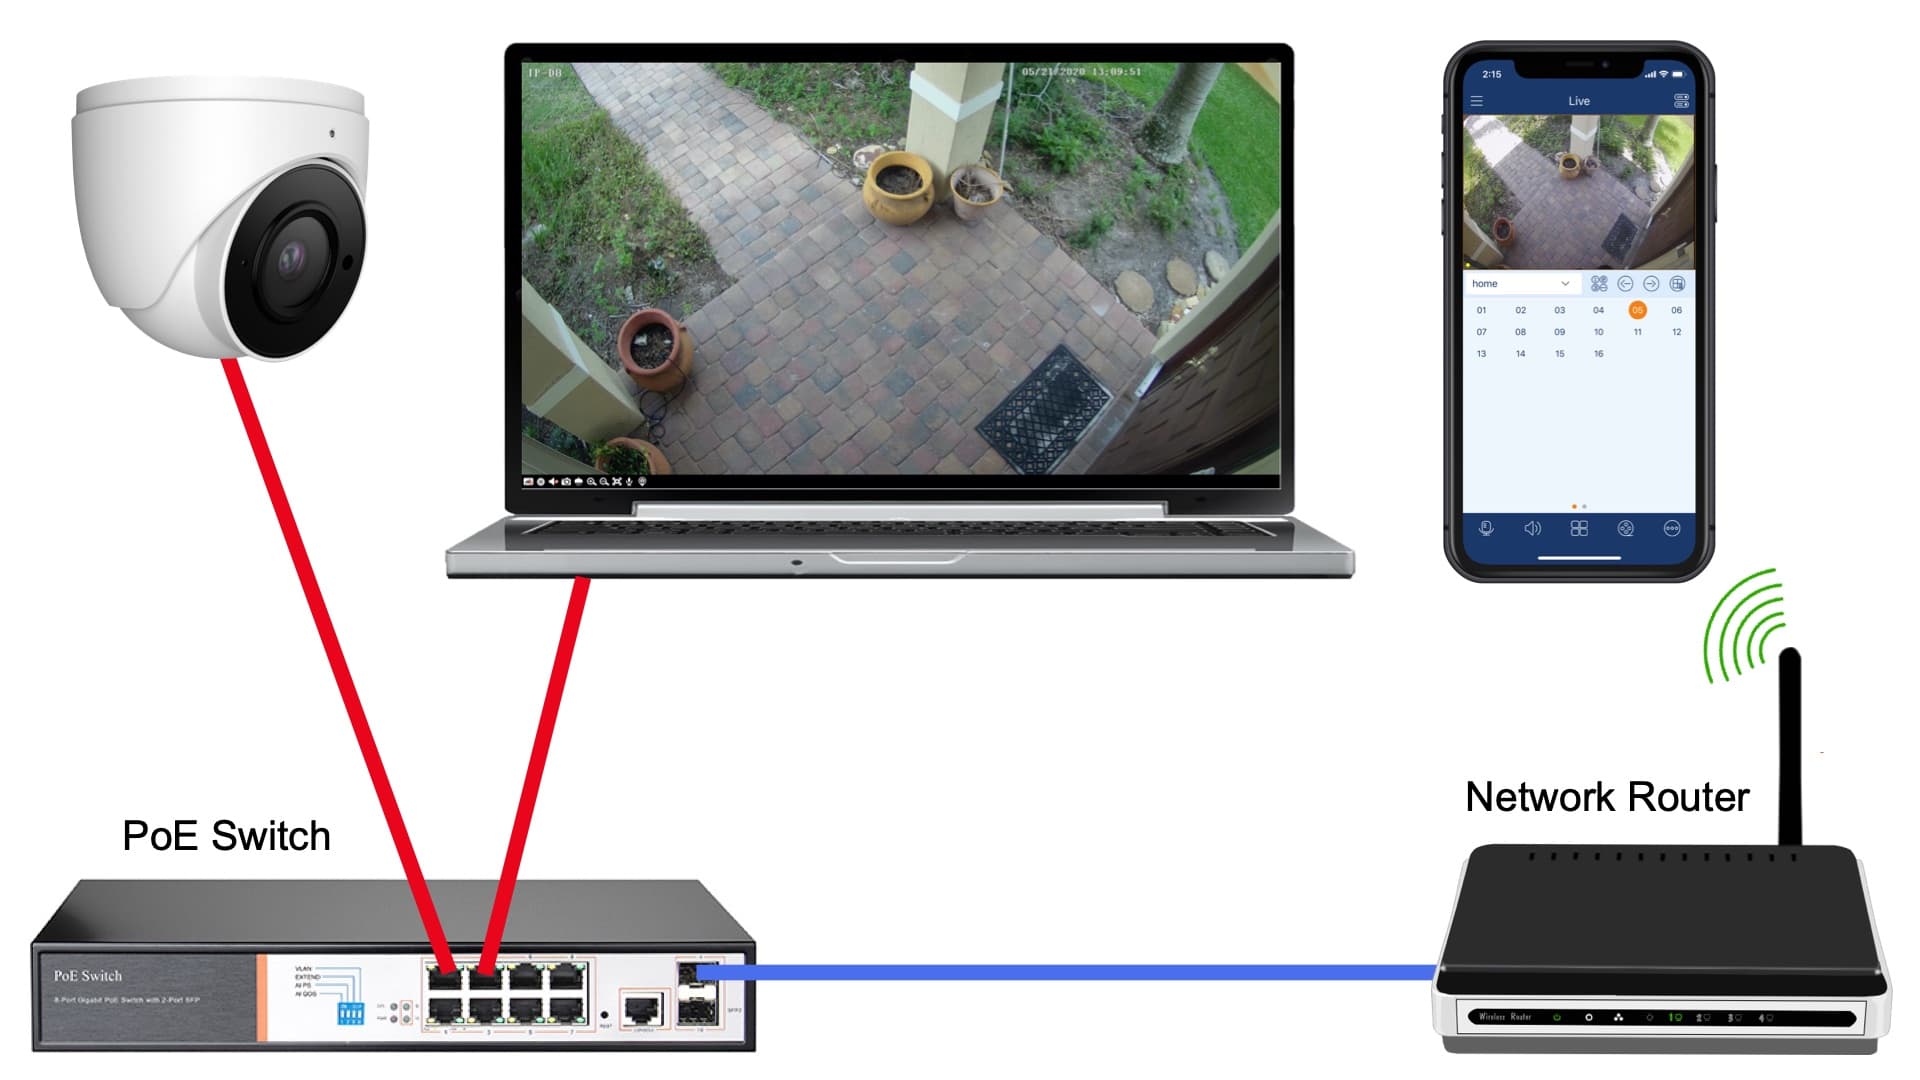
Next, connect the camera to your router. Use the Ethernet cable. Plug one end into the camera. The other end goes into the router.
Now, the camera is ready to connect to your network.
Step 3: Set Up the Camera
Open your computer or smartphone. Download the camera app. Most cameras have their own app. Follow the instructions in the app.
Open the app and create an account. This helps you access the camera anytime. Log in to the app.
Follow the app’s guide. It will show you how to add your camera. The app will search for your camera. Once found, add it to your account.
Step 4: Configure the Camera
Now, set the camera settings. Go to the settings section in the app. Adjust the video quality. Choose high for clear images. Set the alerts. Choose how you want to be notified. You can receive alerts through email or app notifications.
Set the camera’s recording schedule. Choose if you want it to record all the time or just when it detects motion.
Step 5: Mount the Camera
Now, it’s time to mount the camera. Use a drill to make holes in the wall. Secure the camera with screws. Make sure it is tight and stable.
Adjust the camera angle. Make sure it captures the important areas. Check the live feed on your app. This helps in adjusting the angle correctly.
Step 6: Test the Camera
Finally, test the camera. Check the video quality on your app. Make sure you receive notifications. Walk in front of the camera to test motion detection.
If everything works, your IP camera is ready. If not, check the connections and settings.
Credit: www.electricaltechnology.org
Credit: www.cctvcamerapros.com
Tips for Better Camera Use
- Keep the camera lens clean.
- Regularly check the connections.
- Update the camera software when needed.
- Change your password regularly for security.
Frequently Asked Questions
What Is An Ip Camera?
An IP camera is a digital video camera. It transmits data over a network.
How Do I Install An Ip Camera?
Connect the camera to power. Then, connect it to your network. Use the camera’s app to configure.
Do I Need Wi-fi For Ip Cameras?
Yes, Wi-Fi allows wireless data transmission. It simplifies setup without extensive cabling.
Can Ip Cameras Work Without The Internet?
Yes, they can. Local network access is required, though. Remote access needs internet.
Conclusion
Installing an IP camera is easy. It helps in keeping your place safe. Follow these steps carefully. You will have a working camera in no time. Always choose a good spot for the camera. This ensures the best coverage.
Remember, security is important. An IP camera is a great tool for this. With the right setup, you can watch your home or business anytime. Stay safe!