Setting up an IP camera can be easy. This guide will help you. Follow the steps to get your IP camera working.
Credit: www.ipcent.com
What is an IP Camera?
An IP camera is a camera that uses the internet. It lets you see what it sees from anywhere. You can use your phone or computer to watch.
Things You Need
- IP Camera
- Internet Connection
- Router
- Computer or Smartphone
These items will help you set up your camera. Make sure you have them ready.
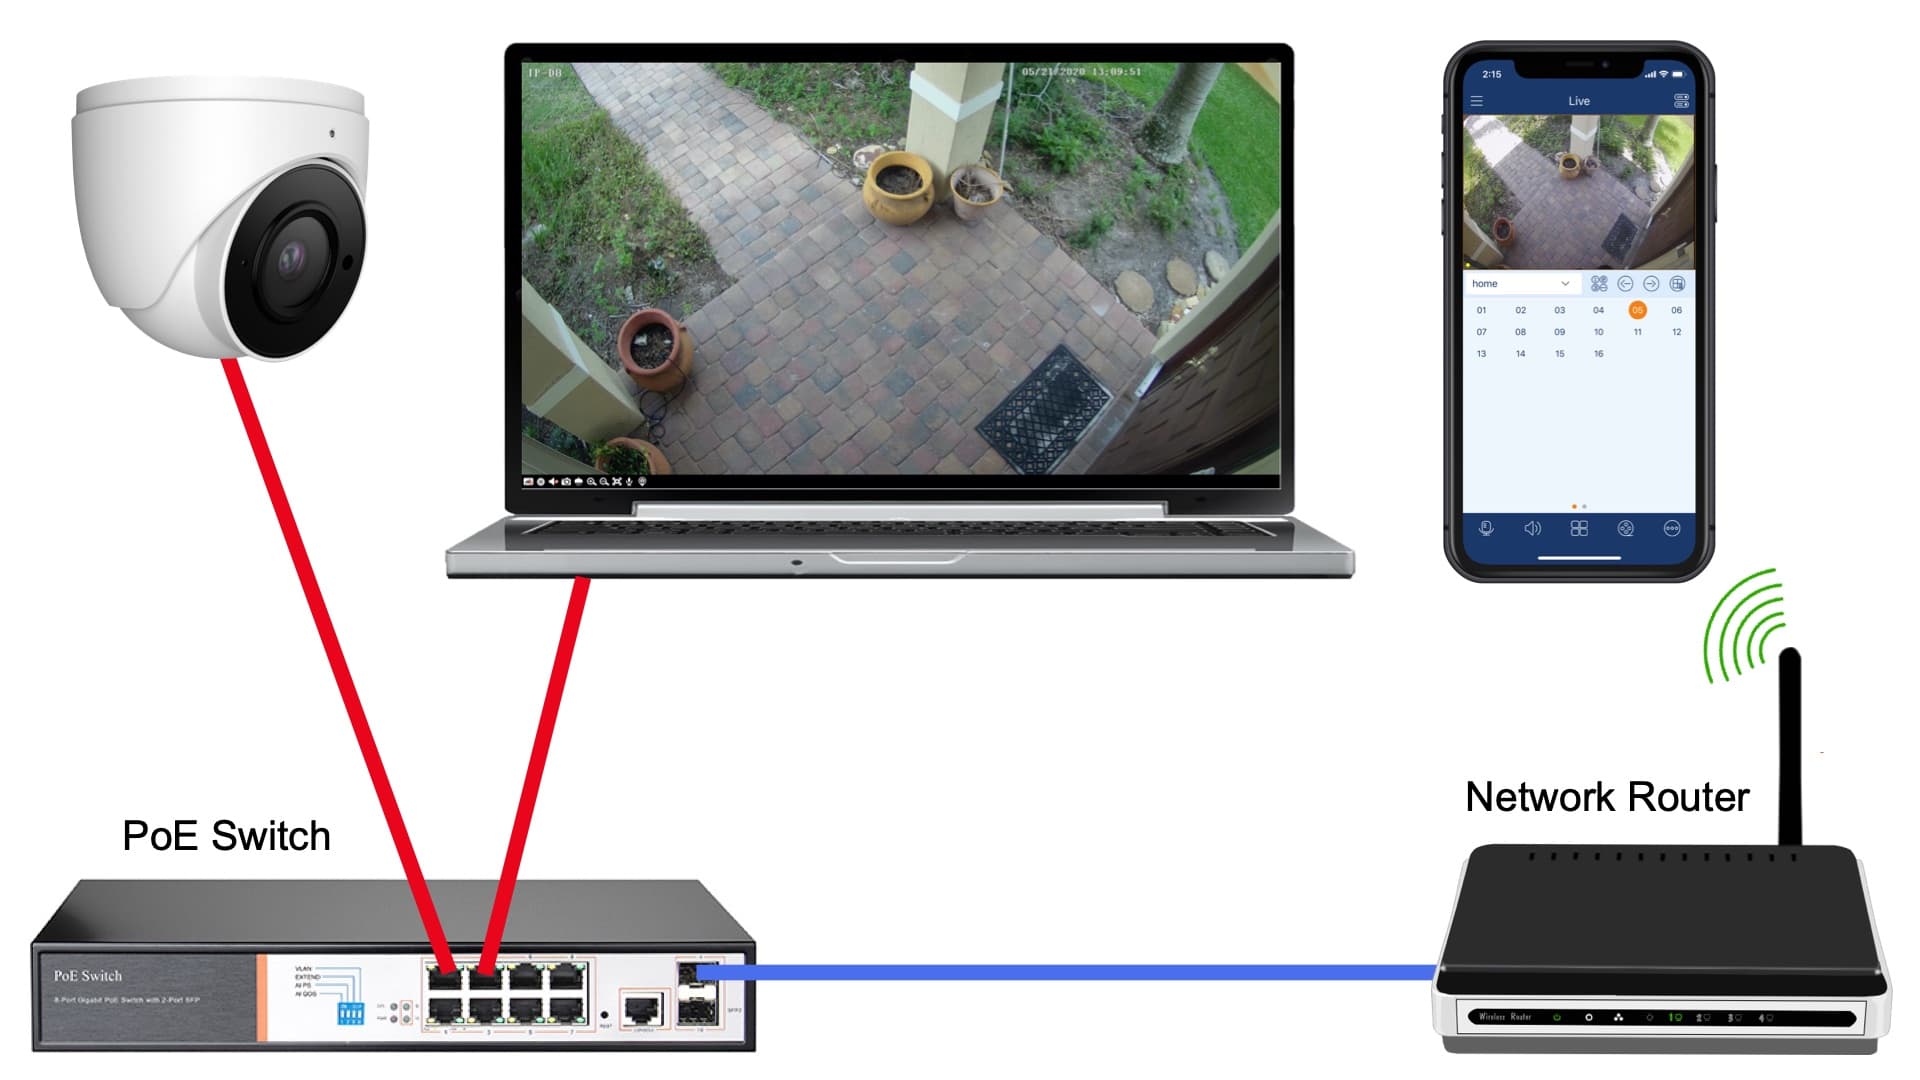
Step 1: Connect the Camera
First, you need to connect the camera. Use the power adapter to plug it in. Then, connect the camera to the router. You can use a cable or Wi-Fi.
Using A Cable
If you use a cable, plug it into the camera. Then, plug the other end into the router. This will connect the camera to the internet.
Using Wi-fi
If you use Wi-Fi, turn on the camera. Find the camera’s network on your computer or phone. Connect to it. Then, follow the instructions in the camera manual. This will connect the camera to your home Wi-Fi.
Step 2: Install the Software
Most IP cameras come with software. You need this software to use the camera. Install it on your computer or phone. You can find the software on a CD or online.
Follow these steps:
- Put the CD in your computer. Or download the software from the internet.
- Open the software. Follow the instructions to install it.
- Once installed, open the software. You will use this to see your camera.
Step 3: Find the Camera’s IP Address
Every IP camera has an IP address. This address lets you find the camera on the internet. The software will help you find this address.
Follow these steps:
- Open the camera software.
- Look for a button or link that says “Find IP” or “Search Camera.”
- Click the button. The software will show the camera’s IP address.
Step 4: Access the Camera
Now, you can access the camera. Use the IP address you found. Type it into your web browser. This will take you to the camera’s page.
Follow these steps:
- Open your web browser.
- Type the camera’s IP address in the address bar. Then press enter.
- Log in with the username and password. You can find these in the camera manual.
Now, you can see what the camera sees. You can also change settings if needed.
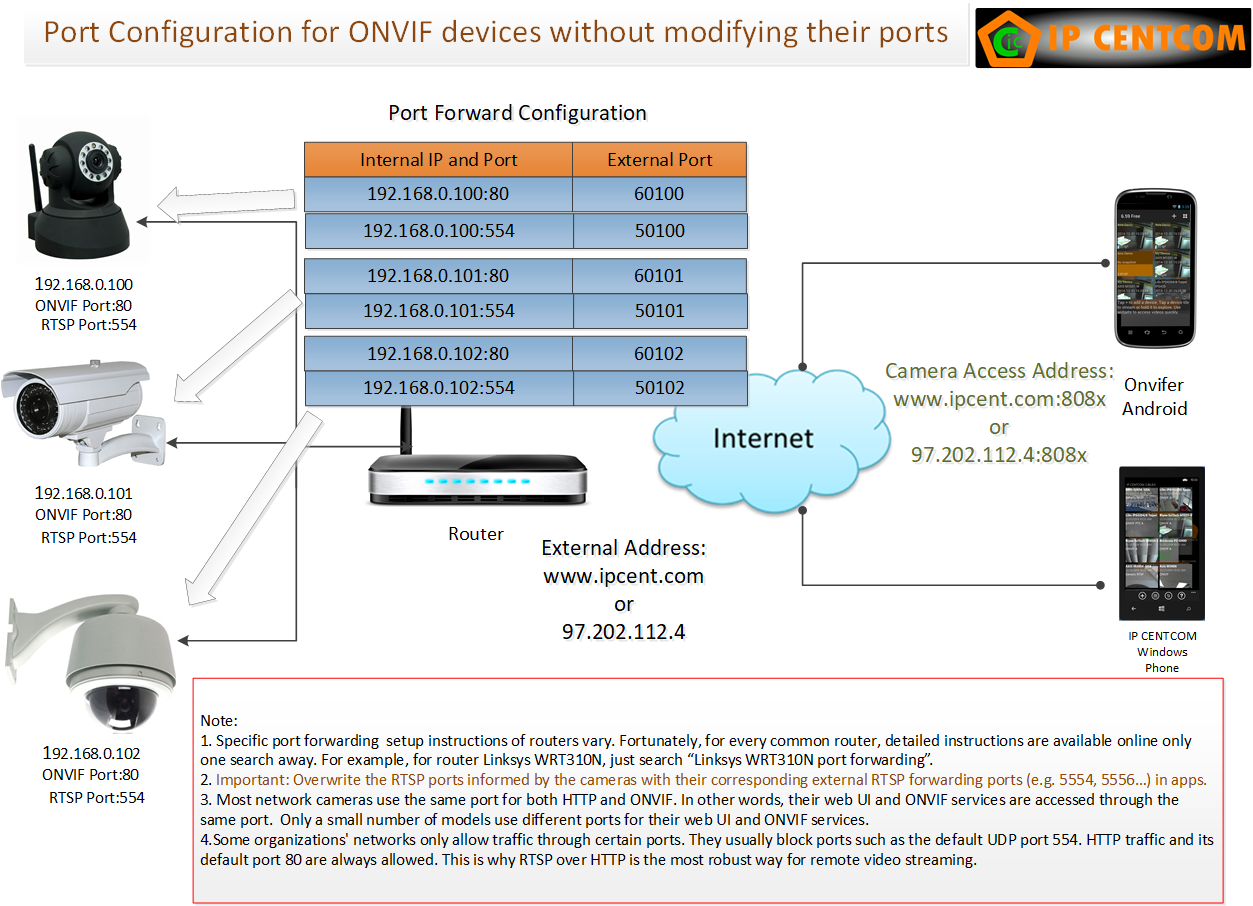
Step 5: Set Up Remote Viewing
You might want to see your camera from far away. This is called remote viewing. It lets you check your camera from anywhere.
Follow these steps:
- Open the camera software.
- Look for a setting called “Remote Access” or “DDNS.”
- Follow the instructions to set it up. You might need to create an account.
Now, you can see your camera from your phone or another computer.
Step 6: Secure Your Camera
It’s important to keep your camera safe. You don’t want others to see it. Change the default password to a new one.
Follow these steps:
- Log into the camera’s page using the IP address.
- Find the settings for “Account” or “Password.”
- Change the password to something strong. Use letters and numbers.
Now, your camera is safer from others.
Step 7: Test Your Camera
Once everything is set up, test your camera. Make sure you can see it on your phone or computer. Walk around to see if it follows you.
If it works, your setup is complete. If not, check the instructions again. Make sure you did each step right.
Common Problems and Solutions
Sometimes, things might not work. Here are some common problems and how to fix them:
| Problem | Solution |
|---|---|
| Camera not connecting | Check the cable or Wi-Fi settings. |
| Can’t find IP address | Make sure the camera is on. Try searching again. |
| Can’t log in | Check the username and password. Look in the manual. |
Credit: www.cctvcamerapros.com
Frequently Asked Questions
How Do I Connect My Ip Camera To Wi-fi?
First, access the camera settings. Then, select your Wi-Fi network. Enter the password to connect.
What Is The Default Ip Address For My Camera?
The default IP is usually listed in the camera manual. Commonly, it’s 192. 168. 1. 1 or 192. 168. 0. 1.
How Can I Find My Camera’s Ip Address?
Use network scanning tools or your router’s interface. It lists connected devices and their IP addresses.
Why Can’t I View My Ip Camera Remotely?
Ensure port forwarding is set up on your router. Check if the camera’s remote access is enabled.
Conclusion
Setting up an IP camera is simple. Just follow these steps. You can watch your home or business easily.
Remember to keep your camera secure. Change the password often. Enjoy watching from anywhere!